How I Built a Fully Automated Image-to-Podcast Pipeline for Kids Horror Stories
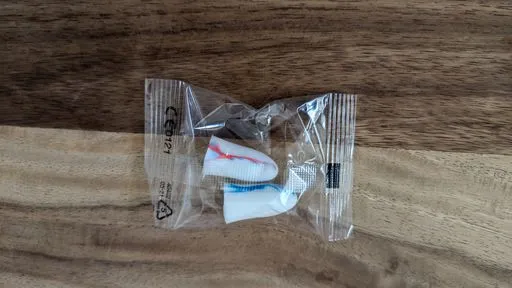
I built a fully automated system that takes photos of everyday objects and turns them into illustrated horror stories, complete with audio narration and Spotify podcast episodes. Here's how I did it.
About a year ago, I built a Kids Horror Stories project where I can take a photo of an everyday object, and the AI uses that image to write, illustrate, and narrate a short, spooky story, publishing it both on the website and as a podcast episode on Spotify via an RSS feed.
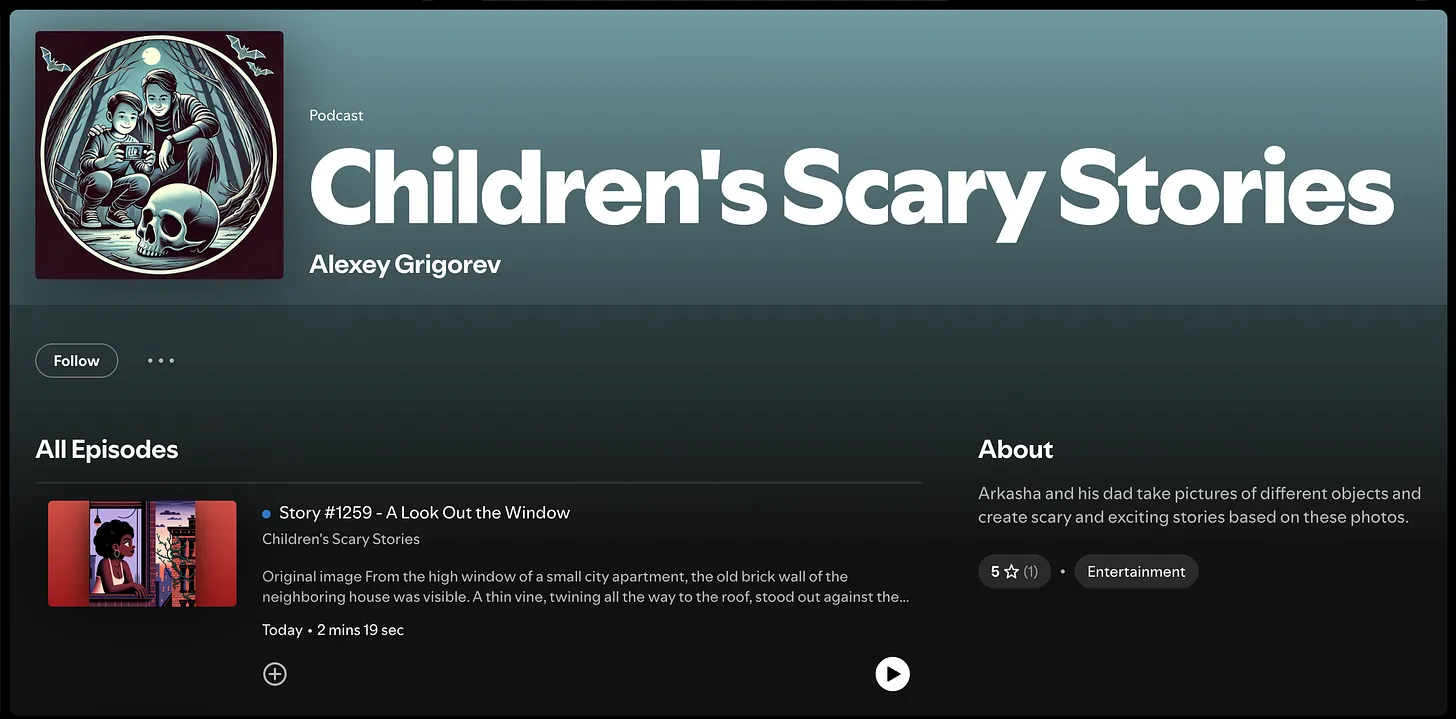
Right now, the site contains 1200+ stories. All the stories are in Russian, but I translated one of them so you can get a sense of the format and tone.
In this post, I want to walk through how the project is built: its architecture, scripts, prompts, and automation.
Inspiration: Storytelling With My Son
This project started with my son asking for scary stories.
During a walk, he pointed at a parked car and asked if I could make up a horror story about it. I improvised something, and he liked it.
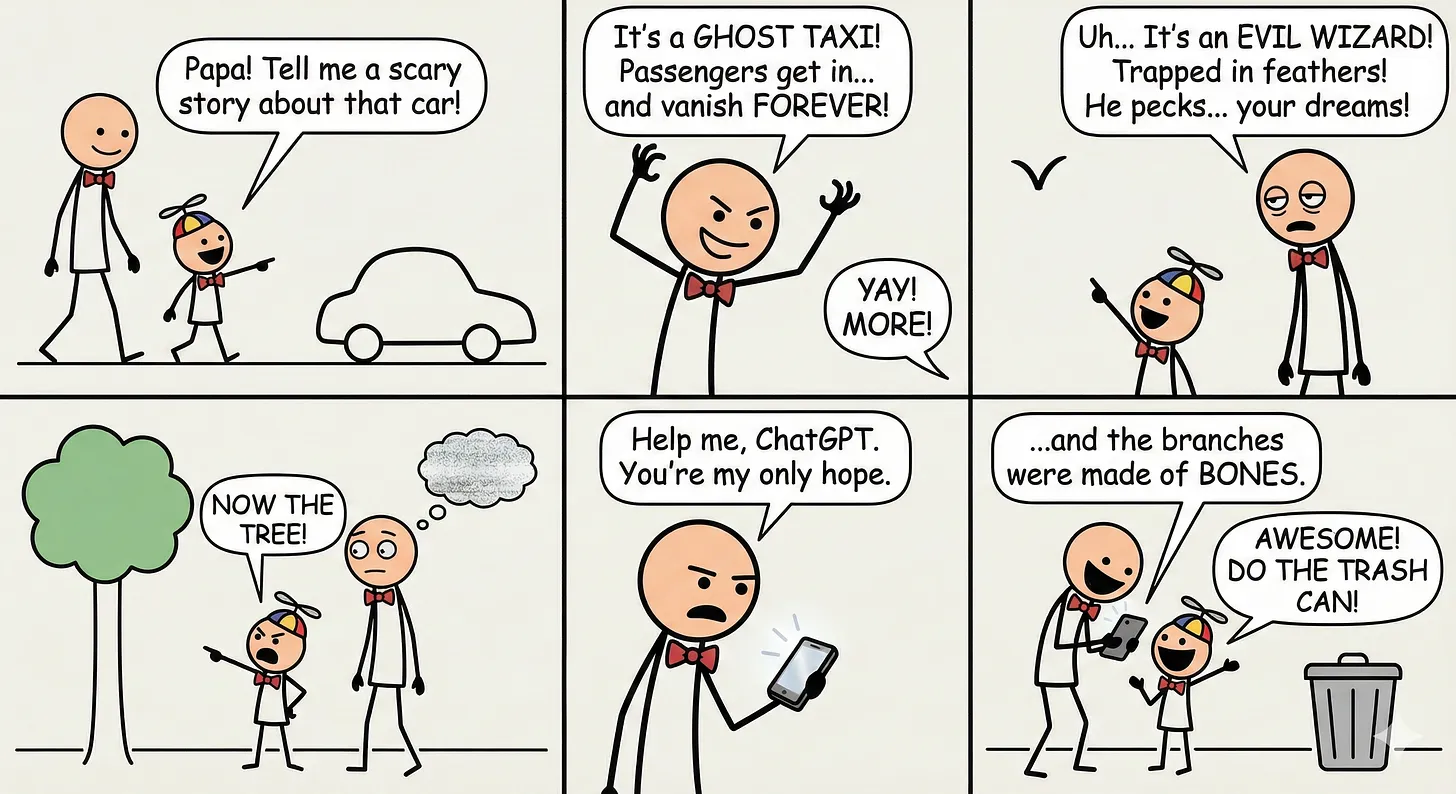
After that, he started pointing at more and more objects. At some point, I ran out of ideas.
When he asked for a story about a tree we passed, I did what felt natural to me: I took a photo of the tree and asked ChatGPT to write a scary story based on the image. The result was better than I expected. The tone reminded me of the short urban legends and campfire horror stories I grew up with: simple, sometimes a bit silly, but kids loved them.
We ended up spending the rest of the day taking photos of random objects and reading the generated stories together.
After a while, we had accumulated quite a few stories, and it felt wrong to leave them buried in chat history. So I decided to publish them somewhere.
How I Built It
Project Website
The fastest option was a static site, a small Jekyll project hosted on GitHub Pages. I already had experience with that setup, so it came together quickly.
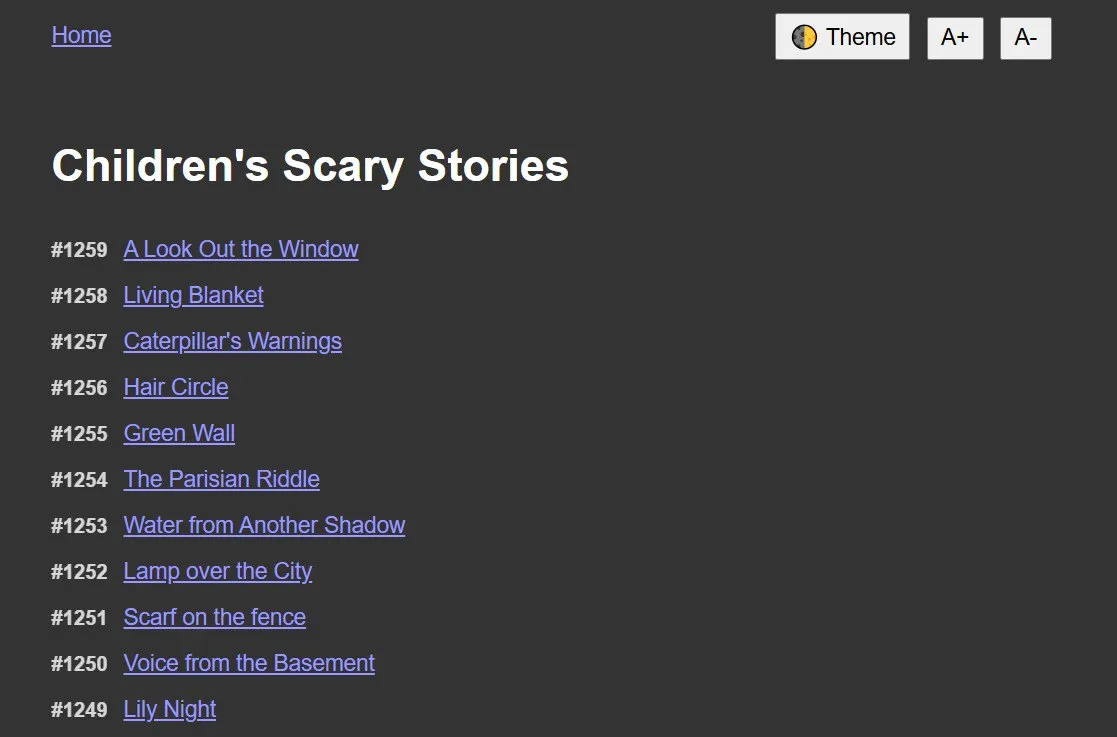
The first version was minimal: just photos and text stories rendered as static pages.
Over time, this evolved into a fully automated pipeline that now generates stories, illustrations, audio, and podcast episodes on its own.
Below, I'll show you how I built it.
Architecture Overview
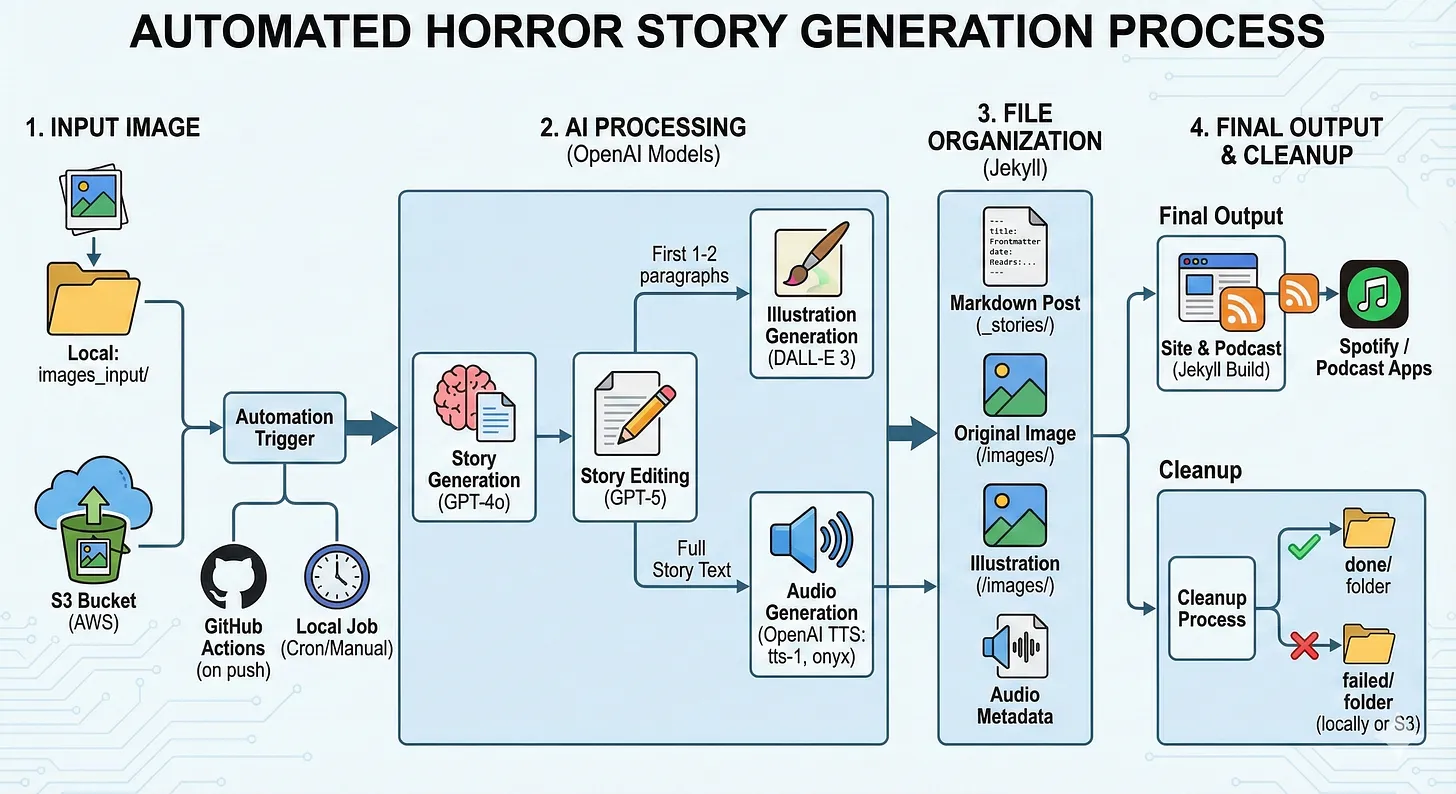
At a high level, the system does this:
- Input image: Either dropped into a local folder or uploaded to an S3 bucket.
- Story generation (GPT-4o): Look at the image and generate a horror story (with title + slug) using a constrained prompt.
- Story editing (GPT-5): Clean up grammar and phrasing in Russian.
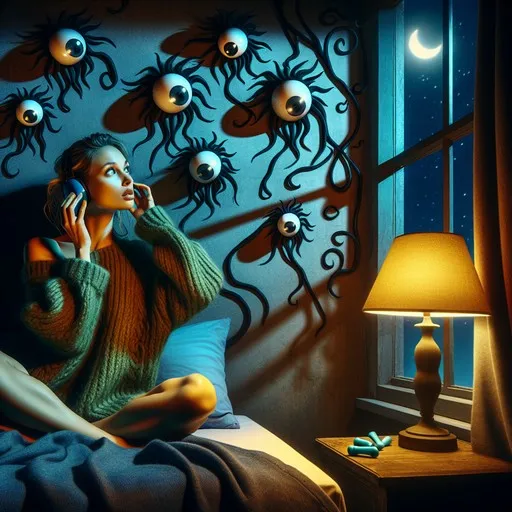
- Illustration generation (DALL-E 3): Use the first 1-2 paragraphs to create a prompt and generate an illustration in a consistent style.
- File organization (Jekyll): Save markdown post with frontmatter, original image, illustration, and audio metadata.
- Audio generation (TTS): Convert the story into speech using OpenAI TTS (tts-1, voice onyx), store audio and record metadata.
- Cleanup: Move processed images to done/, failed ones to failed/ (locally or on S3).
- Site and podcast: Jekyll builds the site. An RSS feed (XML) is updated and used by Spotify / podcast apps.
Project Layout
A minimal layout looks like this:
.
├── images_input/           # Raw incoming photos (local option)
├── images/                 # Resized images and illustrations
│   ├── XXX-slug.jpg        # AI illustration
│   └── XXX-slug-source.jpg # Original photo (resized)
├── _stories/               # Jekyll posts (.md with frontmatter)
├── assets/
│   └── audio/              # MP3 files
├── process_stories.py    # Main pipeline: image → story → illustration → files
├── generate_audio.py     # Story → TTS → MP3 + metadata
├── podcast.xml             # RSS feed for Spotify / podcast apps
└── .github/
    └── workflows/
        └── main.yml        # GitHub Actions workflow
The Complete Pipeline
We'll use this story as an example. And here's the file, process_stories.py, with the main pipeline. The prompts I use are in Russian, but I have translated them into English for you.
Here's exactly how each story gets created, step by step:
Step 1: Input Image
The script picks the first available image from one of two sources:
- Local: images_input/
- S3: kids-horror-stories-ru-images/input/
Step 2: Story Generation from the Image (GPT-4o with Vision)
The image is converted to base64 (for the chat image input) and passed to GPT-4o with this prompt:
I want you to tell a scary story. I will send you a photograph: first, describe the photograph, and then, based on this image, come up with a horror story. Make it frightening, something in the spirit of urban folklore or urban horror legends. The ending does not have to be happy. Give the story a title.

The story should consist of 8–12 paragraphs.

For titles, do not use words such as "cursed," "curse," "gloomy," "abandoned," "mystery," "shadow," "horror," or "whisper."

Avoid plots in which characters hear rustling sounds or whispers, and also avoid plots in which objects return back to the main characters.

Do not use any formatting for either the title or the text.

The story title must be in Russian.

For the slug, use a short English title that can be used in a URL.
The constraints in the prompt help maintain consistency and avoid repetitive plots.
Step 3: Story Editing (GPT-5)
The raw story from GPT-4o is passed through GPT-5 to clean up grammar and phrasing:
You are an experienced horror story editor with perfect command of the Russian language.

Edit this story. Make sure all grammar is clear and correct, and that there are no awkward or unnatural expressions. If you come across phrases that are not normally used in Russian, or expressions that sound unclear, replace them with ones that are more natural, commonly used, and better suited to the context of the story.

Start directly with the story. Do not include anything else in the response.
This keeps the style but removes awkward constructions.
Step 4: Illustration Generation (DALL-E 3 + GPT-4o-mini)
Next, we generate a custom illustration for the story:
- Extract the first two paragraphs from the final story.
- Ask GPT-4o-mini to turn them into an English scene description in a specific style.
The prompt I use:
Based on the text from the story, create a detailed description of a single scene in English, and then generate an illustration based on that description. Use neutral references for people and animals, not proper names.

If the main character has a female name, use "woman" or "girl."
If the main character has a male name, use "man" or "boy."

If the text contains more than one scene, choose only one and create a detailed description of that scene. The description should not include a sequence of actions; instead, it should focus on describing one specific moment or setting.

The illustration will be used as a logo for a podcast episode, so the details should be shown in close-up. There should not be many objects, only the most essential elements needed to convey the scene. No more than one or two people.

Text:
{first_two_paragraphs}

Illustration style:
a flat, linear style with bold outlines and minimalistic, vibrant colors.
The scene should include whimsical and slightly eerie elements.
The overall aesthetic should combine a playful, cartoon-like feeling
with a touch of spookiness, similar to a light-hearted horror theme.

Avoid adding any text to the illustration.

Only include the final illustration prompt in your output. Do not include the scene description.
Feed that prompt into DALL-E 3 to get a 1024x1024 illustration. The result is downloaded, resized (e.g. 512x512, 80% quality), and stored in images/.
Step 5: File Organization & Jekyll Frontmatter
Each story is assigned a sequential ID (e.g. 001, 002, …). This ID is used to build filenames and URLs.
Then I use the save_story function to produce:
- _stories/XXX-slug.md – markdown post with frontmatter
- images/XXX-slug.jpg – AI illustration
- images/XXX-slug-source.jpg – original image (resized)
Example frontmatter:
---
audio_size: 3539520
audio_url: https://kids-horror-stories-ru.s3.eu-west-1.amazonaws.com/audio/999-silence.mp3
date: '2025-03-23'
duration: 02:56
illustration: /images/999-silence.jpg
image_source: /images/999-silence-source.jpg
slug: 999-silence
story_number: '999'
title: Берегите тишину
---
Step 6: Audio Generation (generate_audio.py)
Now we convert the final text into audio with OpenAI's tts-1 model.
- Pass the story text and slug (e.g.
999-silence) togenerate_tts. - Upload the generated MP3 to S3 (e.g.
kids-horror-stories-ru-images/audio/999-silence.mp3). - Update the story frontmatter with:
audio_url(public S3 URL)audio_sizeduration(you can compute from the MP3)- Move the final MP3 to
assets/audio/for GitHub Pages / Jekyll to see it.
Step 7: Cleanup
After successful processing, move the original input image to done/. On failure, move to failed/ and log the error.
This keeps the input queue clean and prevents re-processing the same image.
Step 8: Podcast Feed (RSS)
To get your episodes on Spotify and other podcast apps, you need an RSS XML file that lists your MP3s.
For that, I created podcast.xml, a template for an RSS feed that Jekyll fills up for every new story.
Automation with GitHub Actions
I have a GitHub Actions workflow set up. It automatically pulls new images from Amazon S3, selects the first one, processes it, and publishes a new story.
The workflow runs on a schedule and handles the entire pipeline from image to published story and podcast episode.
Tools I Used
Here are the specific tools and services that made this possible:
GPT-4o (Vision)
- Analyzes images and generates horror stories
- Handles the creative writing with constraints to maintain consistency
GPT-5
- Edits and polishes the generated stories
- Ensures natural Russian language and correct grammar
GPT-4o-mini
- Converts story paragraphs into illustration prompts
- Helps maintain consistent visual style
DALL-E 3
- Generates custom illustrations for each story
- Creates consistent visual style matching the podcast aesthetic
OpenAI TTS (tts-1, voice onyx)
- Converts text stories into natural-sounding audio narration
- Produces MP3 files ready for podcast distribution
Jekyll + GitHub Pages
- Static site generation for the website
- Handles markdown posts and RSS feed generation
- Free hosting
Amazon S3
- Stores input images and generated audio files
- Provides public URLs for podcast distribution
GitHub Actions
- Automates the entire pipeline
- Runs on schedule to process new images
Key Takeaways
Start simple, then automate: The first version was just photos and text. Over time, I added illustrations, audio, and full automation.
Prompt engineering matters: The constraints in my story generation prompt (avoiding certain words, specific paragraph counts) help maintain consistency across 1200+ stories.
Multi-model pipeline works: Using GPT-4o for vision, GPT-5 for editing, GPT-4o-mini for prompt refinement, and DALL-E 3 for images creates better results than using a single model.
RSS feeds unlock distribution: A simple XML file makes your content available on Spotify and all major podcast platforms without any special APIs.
Automation scales: Once the pipeline was set up, I could process hundreds of stories without manual intervention. The GitHub Actions workflow handles everything.
Real-world inspiration: Starting with a real problem (my son wanting stories) led to a project that now serves thousands of listeners.
Video Walkthrough
If you prefer to follow along in a code-along format, here's a video where I walk through the project and show my screen step by step:
See It Live
You can see the live project and the code here:
- Website (Jekyll, GitHub Pages): kids-horror-stories-ru
- GitHub repo: github.com/alexeygrigorev/kids-horror-stories-ru
- Spotify: Listen to an episode on Spotify
The project demonstrates how AI tools can create complete multimedia content pipelines: from a simple photo to a fully produced podcast episode, all automated and running at scale.
Related content
Telegram Writing Assistant: Claude Code Turns Voice Notes Into Markdown
Learn how I built a Telegram-based writing assistant that uses Claude Code to transcribe voice notes and convert brain dumps into structured Markdown, saved and versioned in a Git…
January 30, 2026
Photo-to-Story AI Pipeline
A small, self-contained project idea: take a photo of an everyday object and turn it into a short story with AI. Expand gradually with illustration, audio, a small website, and a …
December 15, 2025
How I Rebuilt My Personal Website in 10 Minutes With AI
I hadn't updated my personal website since 2012. Using AI tools like Lovable and GitHub Copilot, I rebuilt it from scratch in under 10 minutes. Here's exactly how I did it and wha…
December 05, 2025